
TELESCOPES

Most of what you can see with the naked eye doesn’t go much further beyond our own interstellar neighborhood. Even under the most ideal conditions, the naked eye can only see the smallest sliver of a percent of what is out there. The average person can see about a few thousand stars but there are hundreds of billions of stars in our galaxy alone. This isn’t even including the countless nebulae, star clusters and galaxies that span the universe.
A Dutch eyeglass maker named Hans Lipperhey is typically credited with the invention of the telescope in 1608. At least, he is the earliest record we have of someone applying for a government patent anyway. While Lipperhey’s patent was not approved, word of the telescope spread fast across Europe.
Italian astronomer Galileo Galilei, who is often falsely credited with inventing the telescope, had heard about it by the following year and did improve upon its design to the point that it could be used effectively for astronomical observation. It was because of the telescope that he discovered something that would turn the human conception of the universe on its head forever. Galileo saw objects that did not revolve around the Earth nor the Sun: the four largest moons of Jupiter. This was the final nail in the coffin for geocentrism and firmly cemented Nicolaus Copernicus’ heliocentric model as the accepted theory (learn more about orbits in the gravity primer). This would be the first of many wonders of the universe that the telescope would unlock.
HOW DO TELESCOPES WORK?
Telescopes are far more advanced and efficient today than they were four hundred years ago. However, the fundamental principles that govern them have not changed. We’ve just learned to take better advantage of those principles as much as we can.
The purpose of a telescope is to catch the light that reaches us from distant celestial objects and concentrate it into a focused point. How a telescope accomplishes this depends on what kind of telescope we are talking about. There are three main types of telescopes: the refractor telescope, the reflector telescope and the catadioptric telescope.
TYPES OF TELESCOPES

REFRACTOR
Refractor telescopes consist of a long, narrow tube. At the front end is a convex (curved outwards) lens which bends, or refracts, light inward. This is called the objective lens. The refracted light passes through the tube, focusing to a point where it reaches the eyepiece which magnifies the image. The telescope that Galileo used when he made his first observations of Jupiter’s moons was a refractor telescope of his own design.
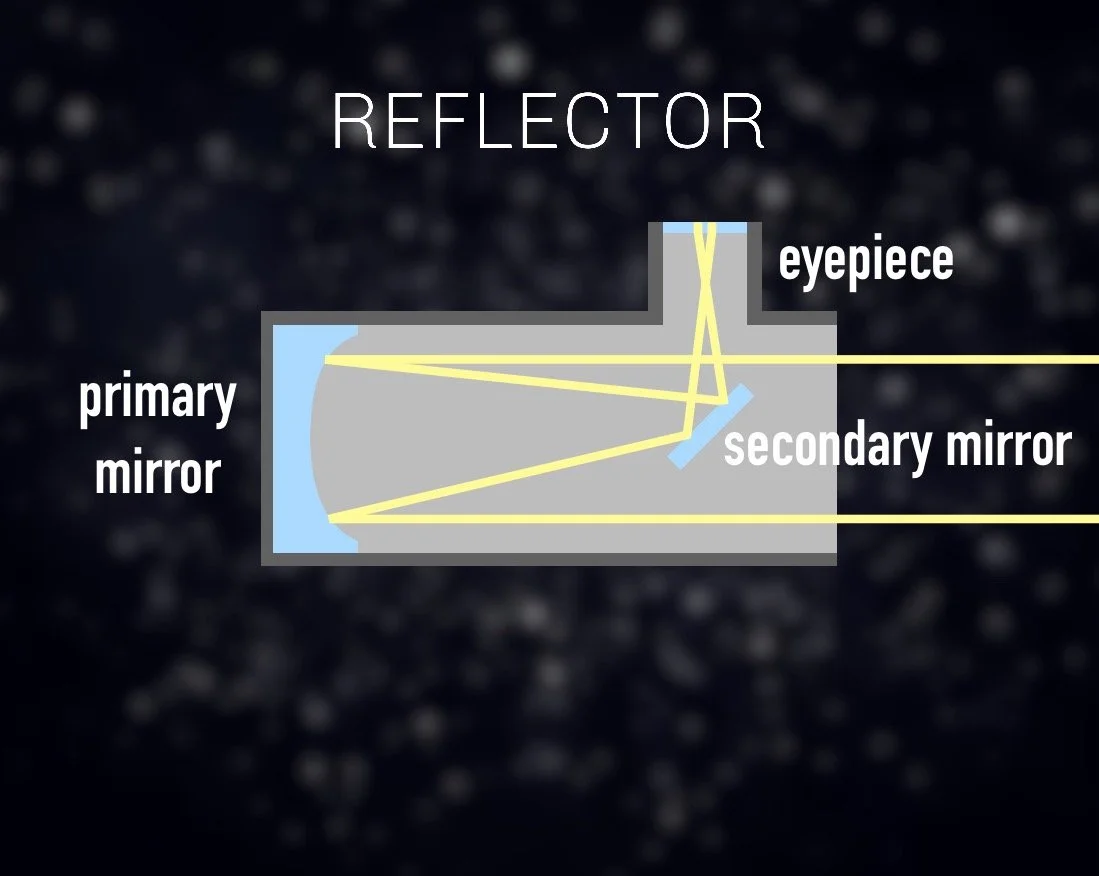
REFLECTOR
Reflector telescopes also consist of a tube but are usually wider and instead of lenses, reflectors use mirrors. Light enters through the front of the tube and reaches the back end where a concave (curved inwards) mirror reflects the light forward. This is called the primary mirror and its curved shape focuses the light much like the objective lens of the refractor does. The converging light, now moving forward, reaches a small, diagonal secondary mirror facing backwards which redirects the light up into the eyepiece sticking out the side of the tube. Reflector telescopes are often called Newtonian reflectors because their modern conception is largely based on Isaac Newton’s late-17th century design.

CATADIOPTRIC
Sometimes referred to as compound telescopes, catadioptric telescopes are essentially a hybrid between a refractor and reflector telescope, using a combination of mirrors and lenses. Light enters the front of the telescope, passing through a corrector plate, a narrow lens with a complex shape which compensates for subsequent optical aberrations. The light reaches a curved primary mirror at the back of the tube which reflects the light forward, just like a reflector. Towards the front of the telescope, the backwards facing secondary mirror is convex (curved outwards) intercepts and once again reflects the light backward. This time, however, the converging light enters into a hole at the center of the primary mirror where it is picked up by the eyepiece at the back of the telescope. HCAS uses a 14-inch Schmidt-Cassegrain in the HCC observatory dome, which is a type of catadioptric telescope.
TYPES OF MOUNTS
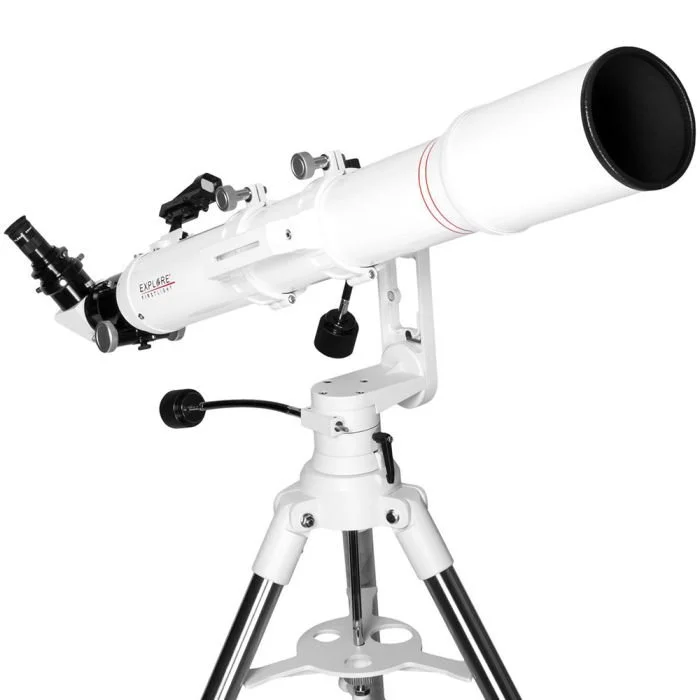
ALT-AZIMUTH (AZ)
An altazimuth mount moves the telescope in altitude (vertical) and azimuth (horizontal) directions, hence the name. It’s the simplest type of mount, making it easier to track objects like the moon and planets as they move across the sky. They are generally cheaper and easier to set up and use, especially for beginners. They are also often more compact and portable compared to equatorial mounts. They are perfect for low-power telescopes but are not recommended for astrophotography.
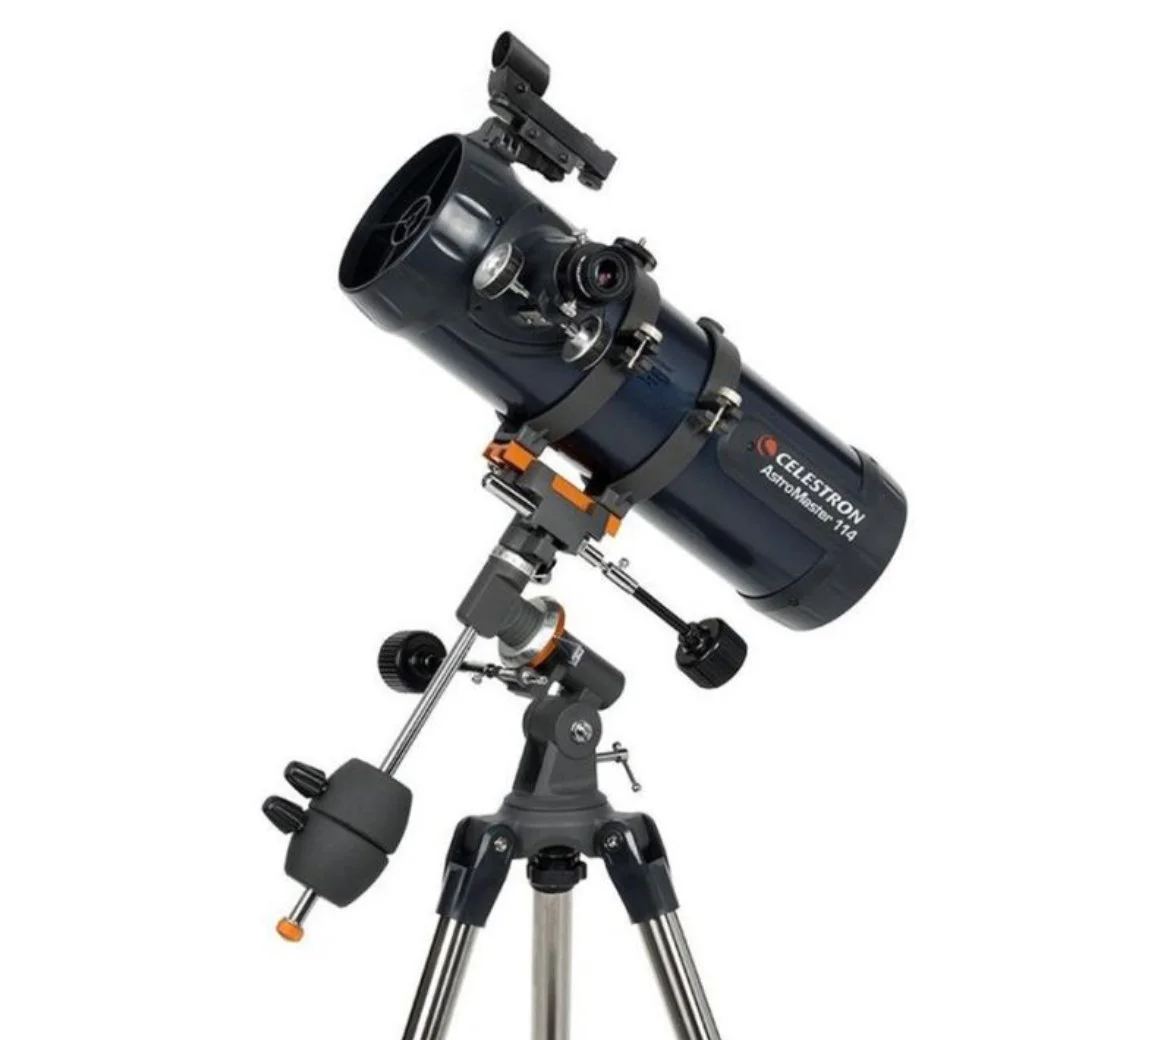
EQUATORIAL (EQ)
An equatorial mount is designed to align with the Earth's rotation, making it easier to track celestial objects as they move across the sky. This makes them a favorite amongst astrophotographers taking long exposure images of an object across multiple hours. Once aligned with the celestial pole (towards Polaris in the northern hemisphere), the telescope can be moved along a single axis to track objects. A counterweight is used to properly balance the telescope. Equatorial mounts can be adjusted manually or electronically using a remote control. However, they can be more complex to set up and use, and they often come at a higher price point.
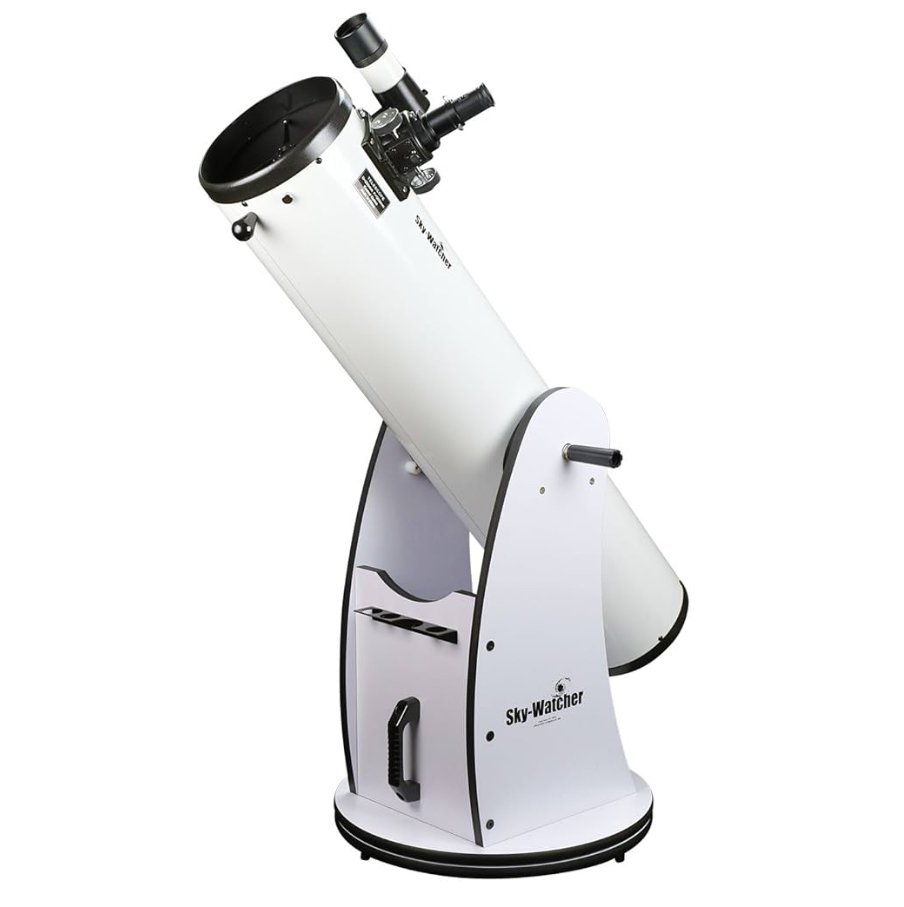
DOBSONIAN (Dob)
Dobsonian mounts are newer, modified versions of the altazimuth mount. It is grounded by a heavy platform and designed to support reflectors, while keeping a steady image. They are simple, lightweight, sturdy and affordable. Smaller dobsonians can be conveniently placed on tabletops for beginner and young astronomers while larger ones provide a stable platform for the heavy-duty telescopes of veteran enthusiasts.
TERMINOLOGY
OBJECTIVE
Objective refers to the primary lens or mirror of a telescope that collects light from distant celestial objects and focuses it to a point. On a refractor, this would be the glass lens at the front of the tube. On a reflector, this would be the mirror at the back of the tube.
APERTURE
Aperture refers to the diameter of the objective lens or mirror. A bigger aperture means you’re able to collect more light, and therefore more resolution (clearer picture). In fact, the amount of light you can collect goes up with a square of the diameter of the objective. Twice as wide means four times as much light is collected. This diameter is usually measured in millimeters but sometimes you’ll hear people refer to it in inches.
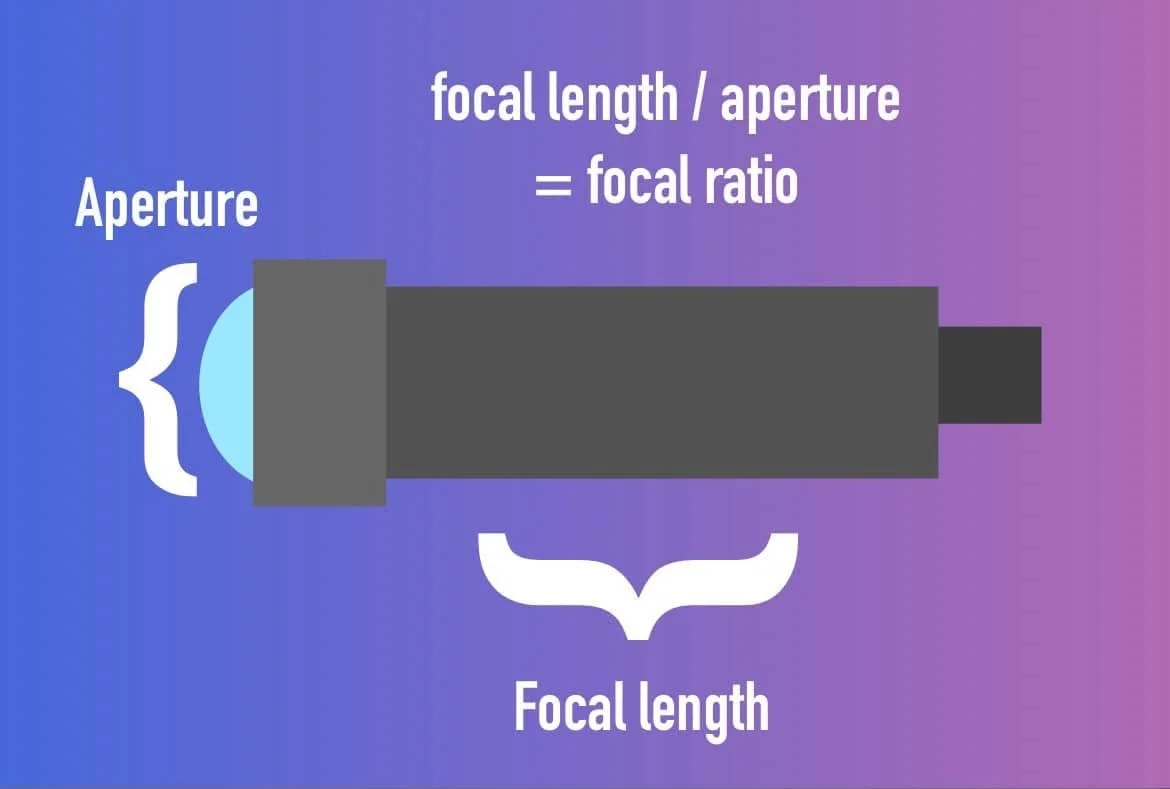
FOCAL LENGTH
Focal length refers to the length of the telescope tube or the distance between the objective and the point at which the light is focused, called the focal plane. This is relevant because it partially determines both the magnifications and the field of view that the telescope can achieve.
This term is also used to describe a property of eyepieces, specifically the distance between the focal plane and the point at which the eyepiece redirects the light to be parallel again.
FOCAL RATIO
Focal ratio refers to the “speed” of a telescope. This is terminology borrowed from the field of photography. The f/ratio is simply derived by dividing a telescope's focal length by its aperture. For example, if a telescope has a focal length of 1000mm and an aperture of 100mm, its f/ratio is therefore f/10.
A lower number, such as f/5 and below, denotes a “faster” telescope which means it has lower magnification, a wider field of view and shorter exposure time (for astrophotography). These tend to be reflector and catadioptric telescopes.
A higher number, such as f/8 and above, denotes a “slower” telescope with higher magnification, a narrower field of view and longer exposure time. These tend to be refractor telescopes.
MAGNIFICATION
Magnification is the ability of an eyepiece to increase the size of the final image. To determine the magnification that an eyepiece will achieve, you must divide the telescope’s focal length by the eyepiece’s focal length. For example, if the telescope’s focal length is 1,000mm and the eyepiece’s focal length is 20mm, the magnification will be 50x. Meaning, objects through that eyepiece will appear 50 times larger than they will with the naked eye. You’ll notice that because the numbers are divided, a smaller eyepiece focal length means a higher magnification.

“WHAT SHOULD I BUY?”
When considering which telescope to buy, the first question you should ask is: What do you want to use it for? Are you primarily interested in viewing the Moon and planets? Would you rather explore deep-sky objects such as galaxies, star clusters, and nebulae? Or are you hoping to try your hand at astrophotography?
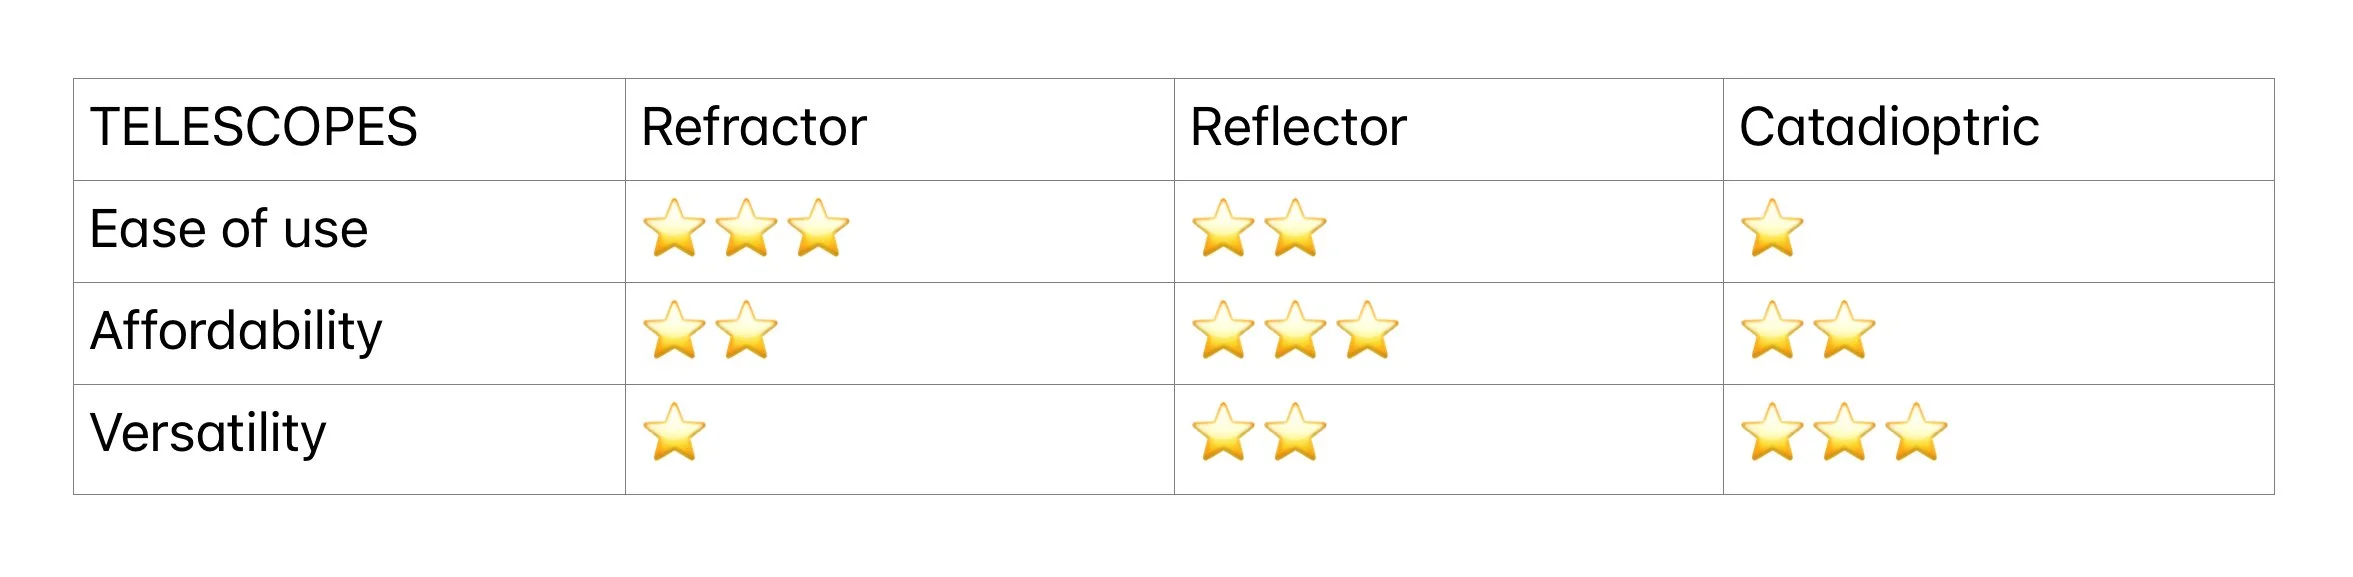
If you’re wanting to see the moon and planets, then a refractor telescope might be the way to go as their glass lenses tend to offer sharper, higher contrast views and are less sensitive to atmospheric conditions. Refractors are also well known for being lightweight and compact making them easy to transport and quick to set up. This favors the spontaneous stargazer. The sealed optical tube protects against dust and moisture, so refractors require little to no maintenance and require no collimation. In other words, refractors provide a great balance between good image quality, portability and ease of use. Be warned, however, that the price of refractors goes up quickly with more aperture as glass lenses are harder to make.
For those wanting to scour the cosmos for deep-sky objects, reflectors are better-suited. These incredibly distant objects are much fainter than the moon and planets. To resolve them, you need more light and to get more light you need more aperture. Reflectors offer larger apertures at cheaper prices compared to refractors. Because they can collect more light, they can potentially achieve higher magnification. Reflectors require more maintenance. During the summer and winter months, reflectors often need to be placed outside ahead of time to acclimate to the environment. Also, the mirror is not directly fitted to the tube and therefore can shift out of alignment over time and interfere with your viewing. This requires collimation to correct (you can learn how to do this towards the end of this section). Overall, reflectors are an affordable and relatively versatile option.
If you are willing to spend the money, catadioptric telescopes offer the versatility to do both planetary viewing and deep sky viewing well. Experienced planet observers often prefer larger aperture Schmidt-Cassegrains or Maksutov-Cassegrains because they can get higher magnification in a more portable package. They tend to be more expensive than reflectors but cheaper than refractors.
Finally, for those with an interest in astrophotography, it may seem like this hobby is locked off to all but the wealthiest tech-smart obsessionists. Fortunately, modern technology has come a long way and imaging the cosmos is within the grasp of even the most amateur stargazers. There are relatively affordable and simple to use options for smart telescopes that can use computers to scan the sky and take stunning images of the cosmos that you can impress all your friends and family with!
A note of caution for those thinking of buying small, cheap, no-name brand telescopes from department stores. While some can be good for their price, many are poorly designed and rely on misleading advertising of excessively high magnification (x300-600 magnification is not at all effective in small telescopes). Too many astronomy journeys have begun and ended with frustration as people wrestle with tiny telescopes on flimsy tripods in their backyard. There’s a reason these are often called “hobby killers.” If you’re going to spend money on a telescope, make it worth your while. A great alternative for beginners who want to view the moon and planets without digging deep into their wallets is a good pair of binoculars or a small tabletop dobsonian reflector from a big brand. They are cheap, very portable and as simple to use as it gets.

“HOW DO I USE MY TELESCOPE?”
Okay, you’ve bought a shiny new telescope and are very excited. Now what?
Before you start lugging equipment outside, you should make sure you have all your ducks in a row:
Make sure your telescope is collimated (for reflector and catadioptric users).
Make sure your finder scope is calibrated.
You have all your extra eyepieces, accessories or star charts you want to use.
A red-filtered flashlight is recommended during stargazing as red light better preserves your eyes’ night vision.
Don’t forget to dress accordingly to the weather and bring something to drink if you don’t know how long you’ll be out there.
Now you need to decide on a location to set up. Ideally, you’ll want to find a place as far from the city lights as possible. The darker the location, the more objects in the sky you’ll be able to see! You’ll also want to find a location that is relatively free of obstructing objects like trees and buildings. If you are going somewhere remote, tell someone where you’ll be, don’t forget the necessary supplies and equipment and be cautious walking around unfamiliar terrain. Make sure you choose a safe, solid and level surface to set up your telescope. You should adjust the legs of the tripod to a comfortable height so that you aren’t hunched over looking into the eyepiece. If you are bringing children along, you may want to have a stepping stool ready for them. Once the telescope is in position, remove the cover from the front of the tube.
Once you are set up, you’ll need to select an object that you wish to view. What is available to see in the sky will depend on both the time of night and the time of year. Certain constellations and deep sky objects like the Orion Nebula (M42) are most viewable during winter nights while others, such as the Butterfly Cluster (M6), are most visible during the summer. This goes for the planets as well but because they too move in their orbits, their positions in the sky will shift over time. If you aren’t sure what object to look for, you could try browsing a star chart or star app on your phone and see if that might inspire you! If you aren’t concerned about finding a particular object and just want to explore around the sky, that’s perfectly fine! In fact, it can be kind of exciting not knowing what you’ll end up discovering!
Once you know where you want to look, turn on your finder scope and start to adjust the telescope tube’s position using the adjustment knobs or remote control to center the finder scope reticle over the object in the sky. Then, go around the telescope and look through the eyepiece. Be careful not to trip over the telescope legs when moving. If your finder scope is well-calibrated, the object should appear right in the center of your eyepiece’s field of view. The object may appear blurry at first, meaning it is out of focus. You can use the focus knobs at the base of the eyepiece to adjust the distance between the eyepiece and the objective lens or mirror. Turn the knobs slowly back and forth until you achieve the sharpest view of the object that you can.
If the object remains too blurry while trying to adjust the focus, you may want to try replacing the eyepiece for one with a lower magnification. To switch out the eyepiece, find and loosen the set screws that secure it in place and pull the eyepiece from the focuser. Select another eyepiece and retighten the screws. With a new eyepiece installed, you’ll likely need to refocus.
As you observe the object, you may notice it will eventually drift out of view. This is actually due to the rotation of the Earth. The higher your magnification, the more pronounced this drift will be. Unless you have a computerized tracker that automatically keeps the object centered, you’ll need to periodically readjust the telescope’s aim manually. If you lose track of the object, try returning to the finder scope to see if you can center it again.
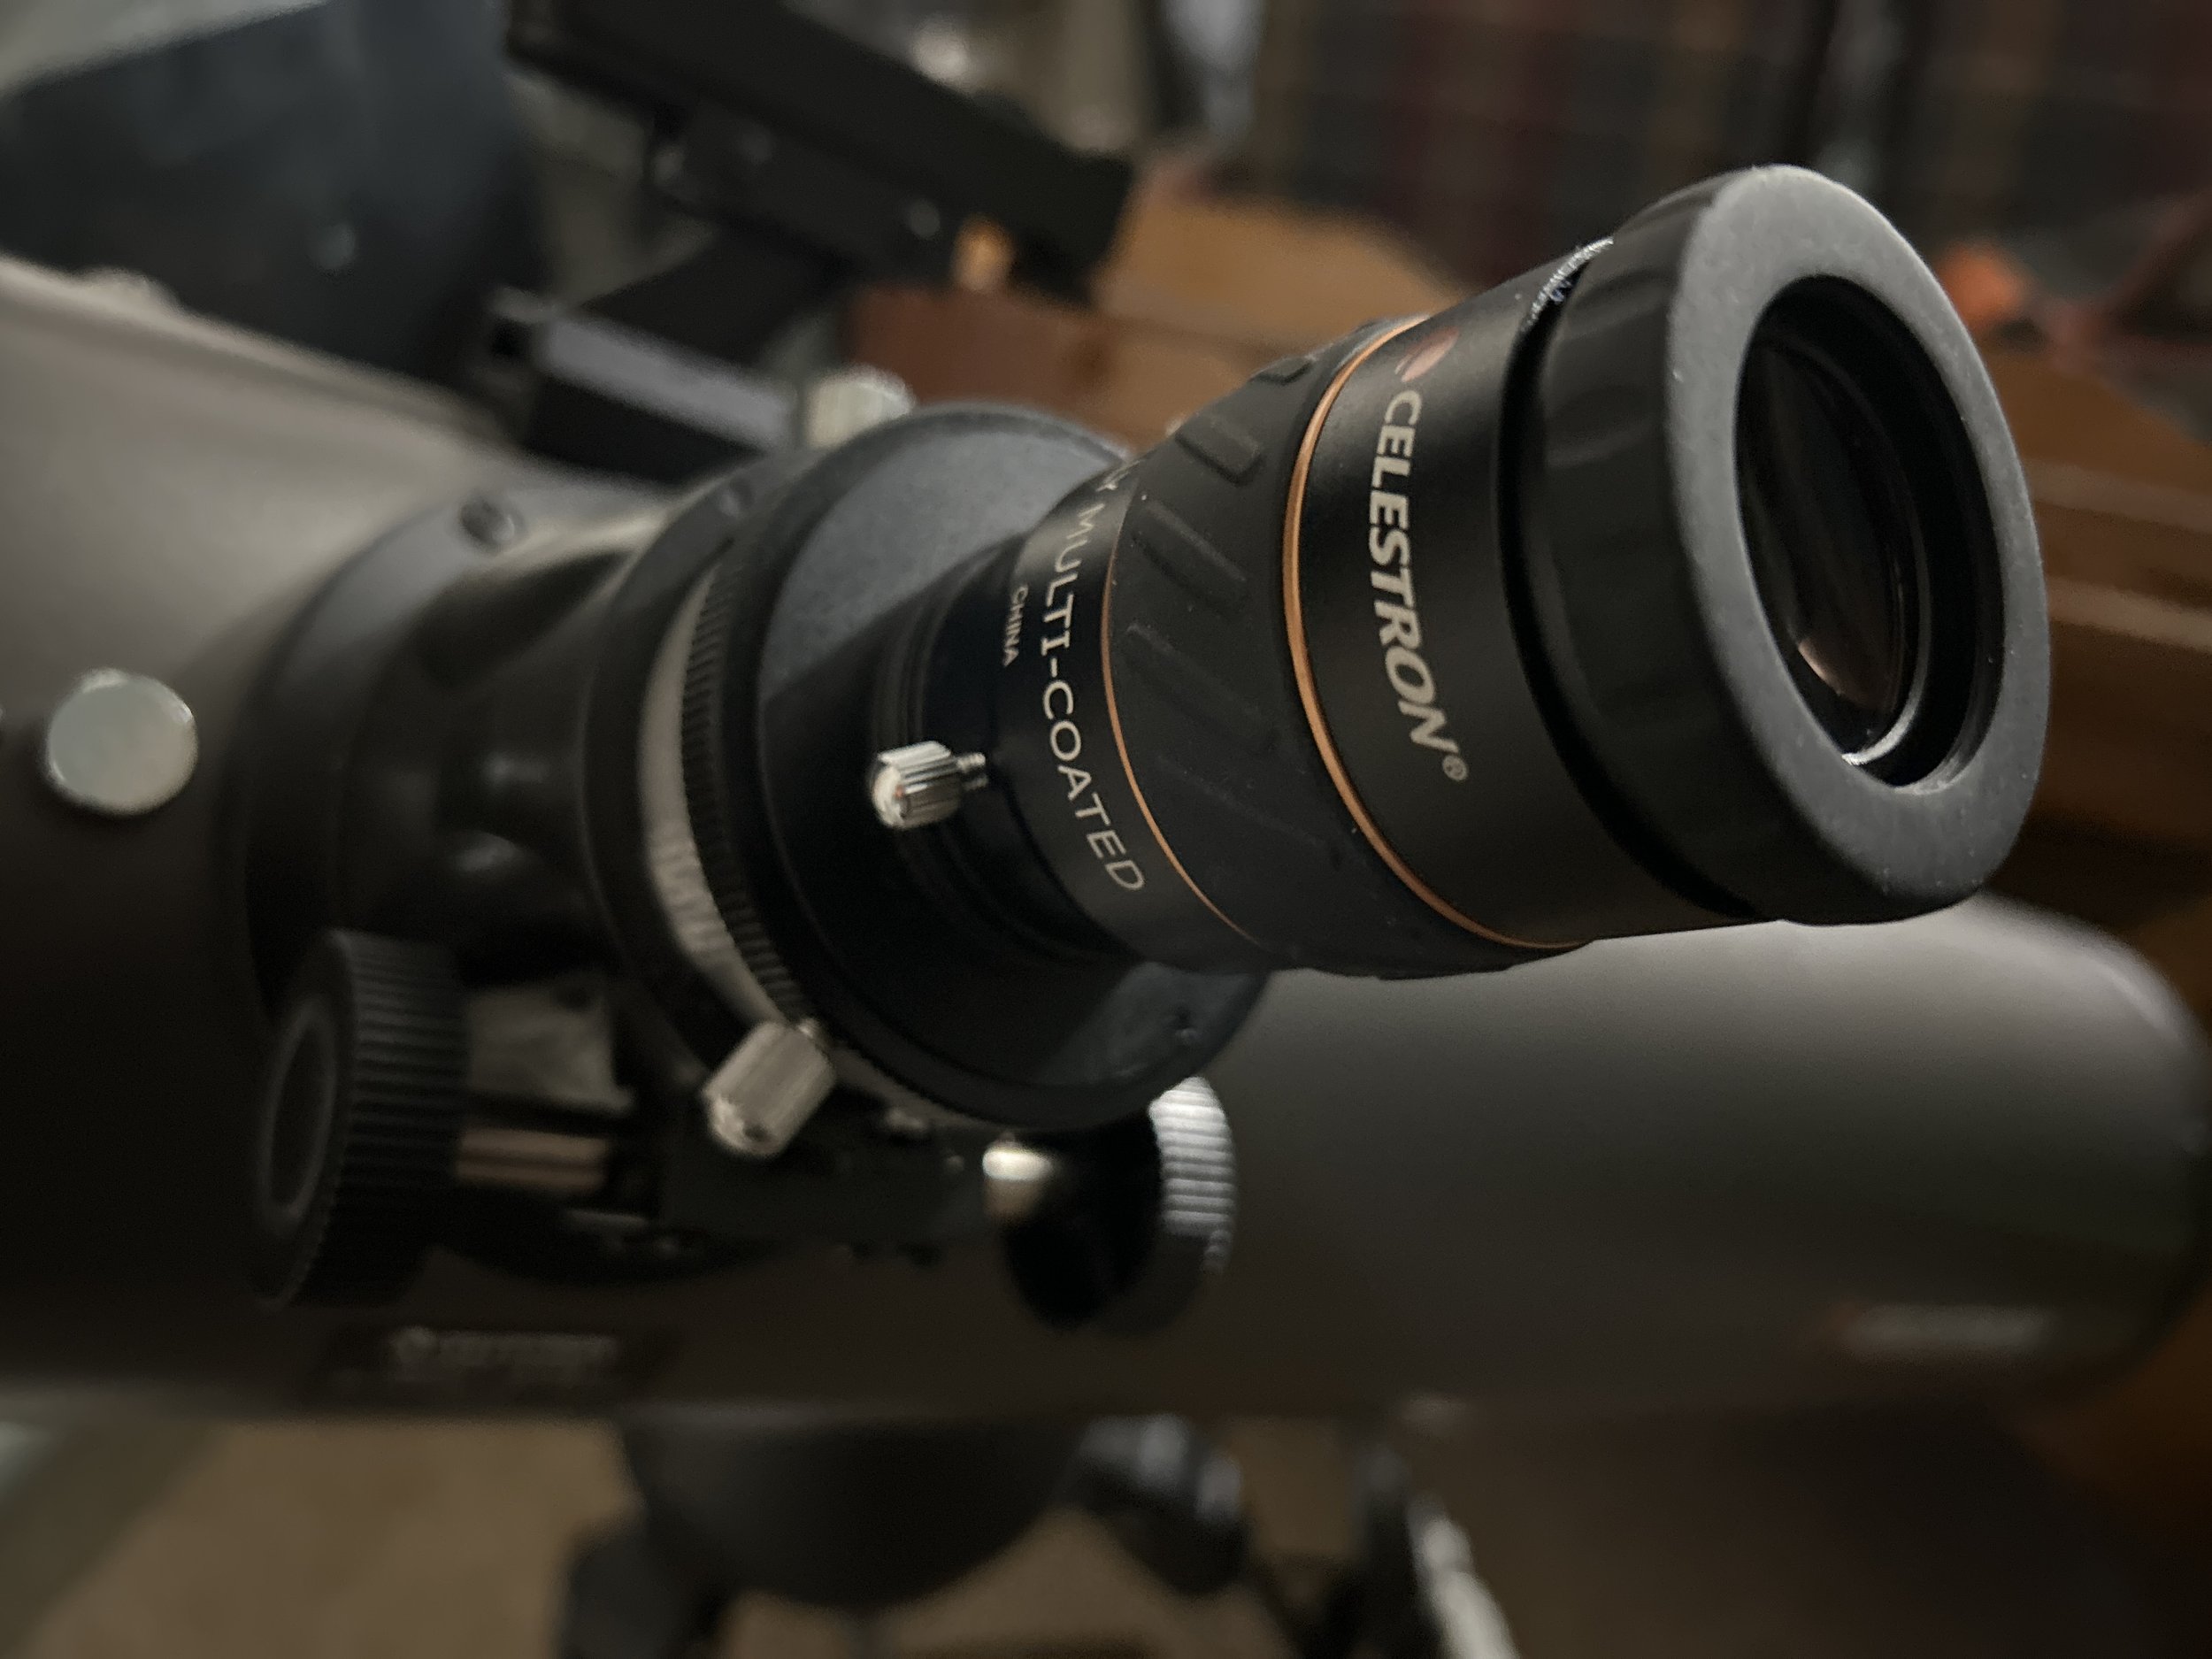
EYEPIECES
An eyepiece is an exchangeable optic that is the final destination of the light passing through the telescope. It is responsible for magnifying the image so that you can see the object.
Eyepieces work by refraction. After the telescope’s objective focuses incoming light into a small image, this light passes through the eyepiece’s first curved lens, which spreads the rays outward. A second lens then refracts the light again, turning it back into roughly parallel rays. Simply put, the telescope gathers more light than the eye can, concentrating it into a small image, and the eyepiece acts like a magnifying glass that enlarges this image while preserving its clarity using the extra light collected.
To determine the magnification that an eyepiece will achieve, you must divide the telescope’s focal length by the eyepiece’s focal length. For example, if the telescope’s focal length is 1,000mm and the eyepiece’s focal length is 20mm, the magnification will be 50x. Meaning, the objects through that eyepiece will appear 50 times larger than they will with the naked eye. You’ll notice that because the numbers are divided, a smaller eyepiece focal length means a higher magnification.
Something about magnification you should keep in mind is that more isn’t always better. Your ability to effectively magnify an object depends on your telescope’s aperture. The bigger your aperture, the more light your telescope can collect. If you try to raise the magnification beyond what is appropriate for the telescope’s aperture, the object will start to become blurry no matter how much you try to adjust focus. Take this into consideration when buying additional eyepieces for your telescope.
NOTE: Ideally, you’ll want to limit magnification to 30x to 40x per inch (or per 25mm) of telescope aperture (except under super steady skies - then go to 50x). For example, with a 4-inch telescope try not to go beyond 120-160x magnification. If the skies are really clear, you can get away with 200x.
Another thing to remember is to make sure any eyepiece you buy fits into your telescope’s focuser. The standard focuser size for most amateur telescopes is 1.25 inches (31.75mm) in diameter. This size has been widely adopted across numerous models and brands. Still, it’s probably a good idea to double check before spending money. There are adapters you can buy to fit eyepieces with different focuser sizes.
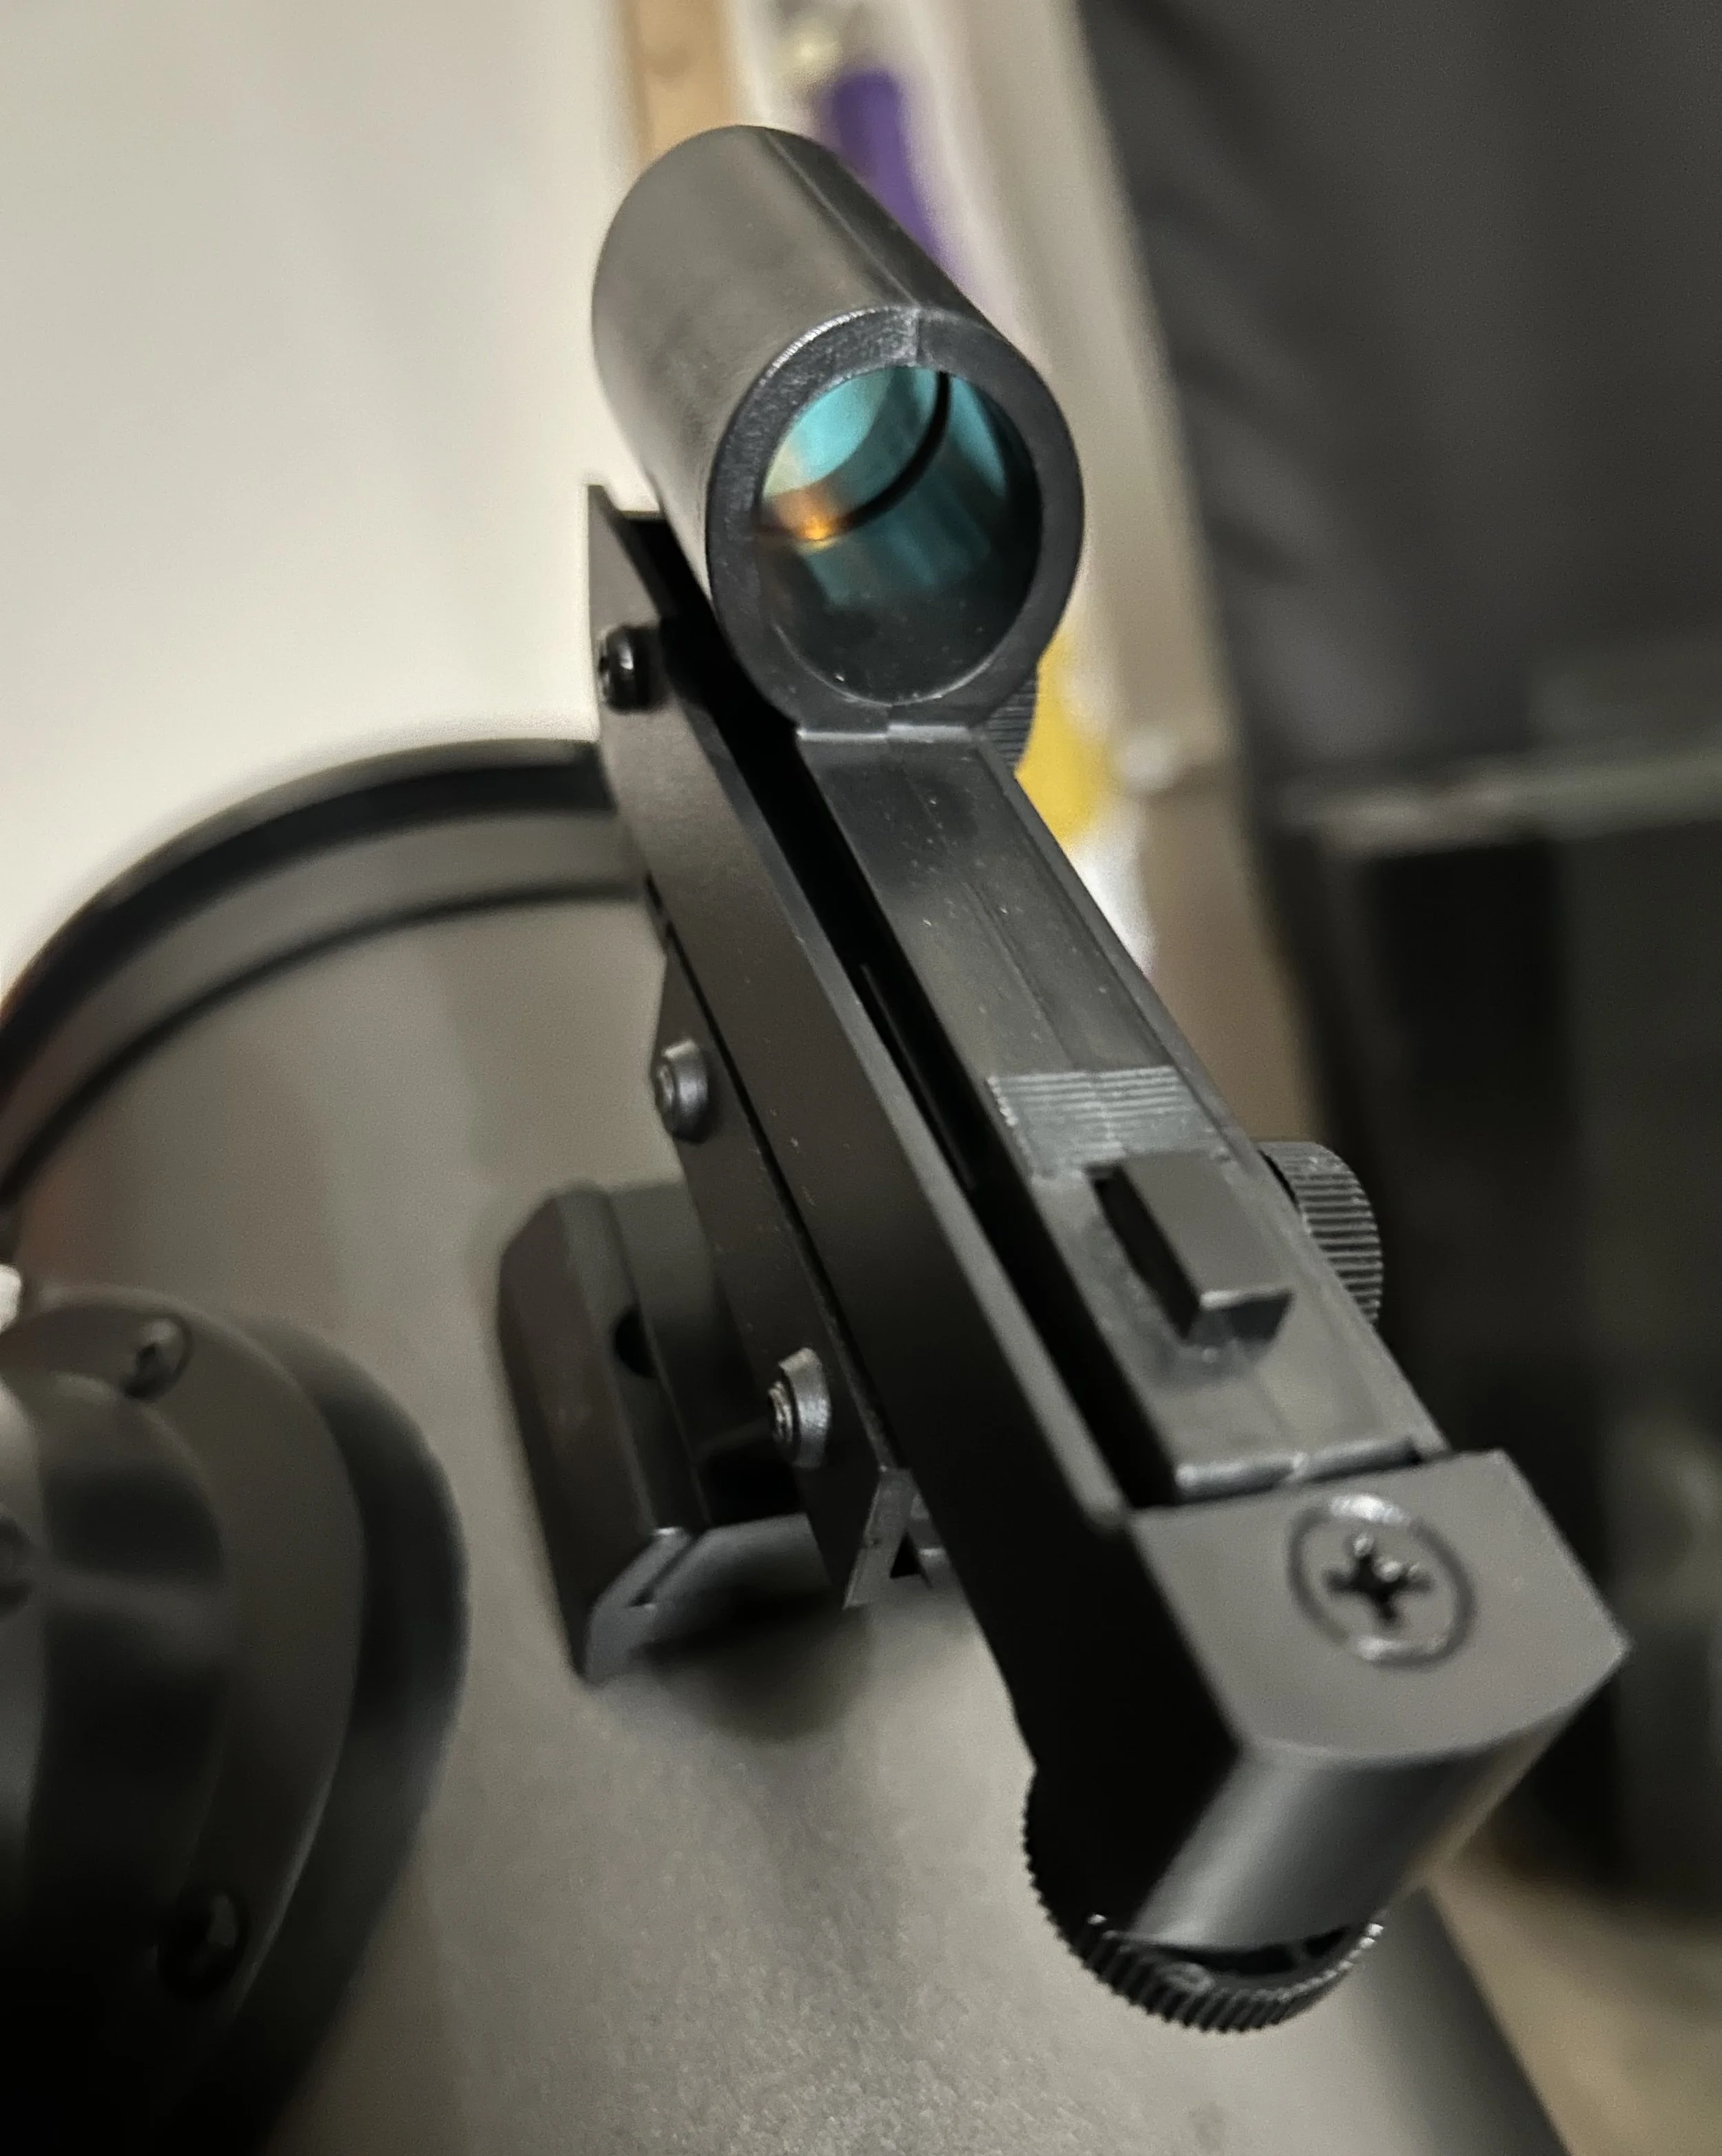
FINDER SCOPES
Mounted on the side of the tube via a bracket is the finder scope, a compact cylindrical device that projects a reticule onto a thin lens. Its purpose is to provide a wider, lower-powered view of the sky that allows you to search for objects before observing through the telescope itself.
Finder scopes are usually battery-operated and can be powered on by turning the knob on the side. This knob also adjusts the brightness of the reticule. The finder scope must be calibrated so that the reticule and the telescope point at the same object. You can adjust the reticule’s position with two other knobs that control the vertical and horizontal position.
Many finder scopes use coin-shaped lithium batteries that can be accessed on the underside.
ACCESSORIES
FILTERS
Telescope filters are covers that can be attached to the front of a telescope or to an eyepiece that modify what kind of light is able to pass through. They are especially useful when doing astrophotography. Different types of filters can have different effects:
Color filters (such as red, blue or yellow) can enhance the visibility of certain surface features on the moon and planets by blocking certain wavelengths of light.
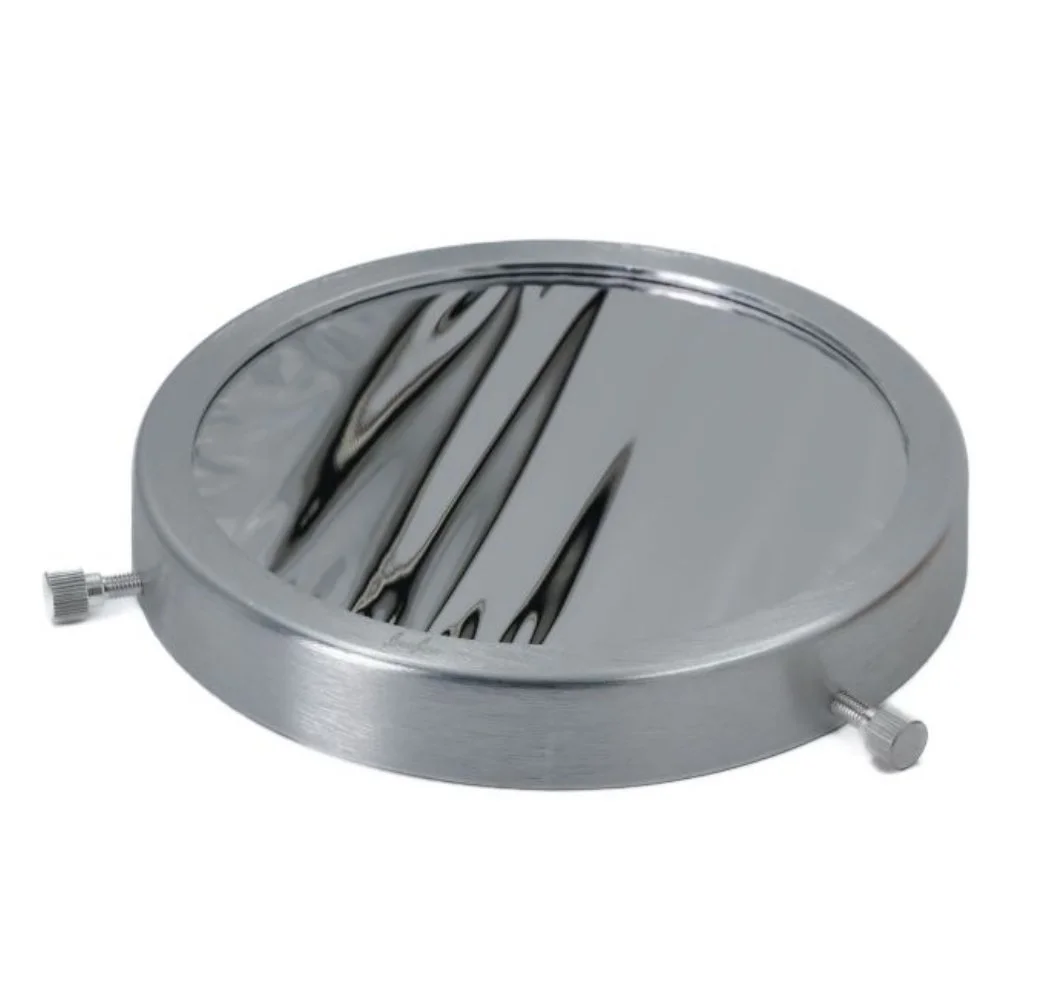
Solar filters significantly reduce the overall light intake, allowing you to look directly at the Sun and see sunspots and solar eclipses.
⚠️ Never look directly at the Sun without a solar filter or solar glasses or you will risk permanent blindness.
Narrowband filters are similar to color filters except they block out all but a very narrow range of wavelengths. These are particularly useful at imaging deep sky objects like emission nebulae.
Polarizing filters reduce glare and increase contrast by selectively allowing through light that comes in from straight ahead and blocks light that comes in at an angle.

BARLOW LENSES
A Barlow lens is a device that is placed between the focuser and the eyepiece that effectively extends the telescope’s focal length which in turn increases magnification. Barlow lenses can double or even triple the magnifying power of an eyepiece. This provides more options as you can combine the Barlow lens with different eyepieces, which means you don’t have to buy eyepieces with that magnification. They are also light and compact, so they are a convenient accessory to have around.

CAMERA MOUNTS
Trying to capture an image through your telescope’s eyepiece with your phone can be a frustrating experience. It’s got to be lined up just right and shaky hands can make a clear image difficult. You can avoid all that by simply getting yourself a prime focus adapter that attaches to the focuser.
“HOW DO I COLLIMATE MY TELESCOPE?”
If you own a reflector or catadioptric telescope, you will occasionally need to collimate it. What does this mean? The primary mirror at the back of the telescope is not rigidly fixed to the structure of the tube. Why? As a telescope undergoes changes in temperature, it will slightly expand and contract. If the mirror were fixed directly to the structure it would deform and produce distortions in the views it creates. Instead, the mirror is mounted to an adjustable structure that allows it to be tilted. However, the mirror can gradually fall out of alignment as the telescope is handled and moved and you’ll need to readjust it accordingly. This is done via collimation.
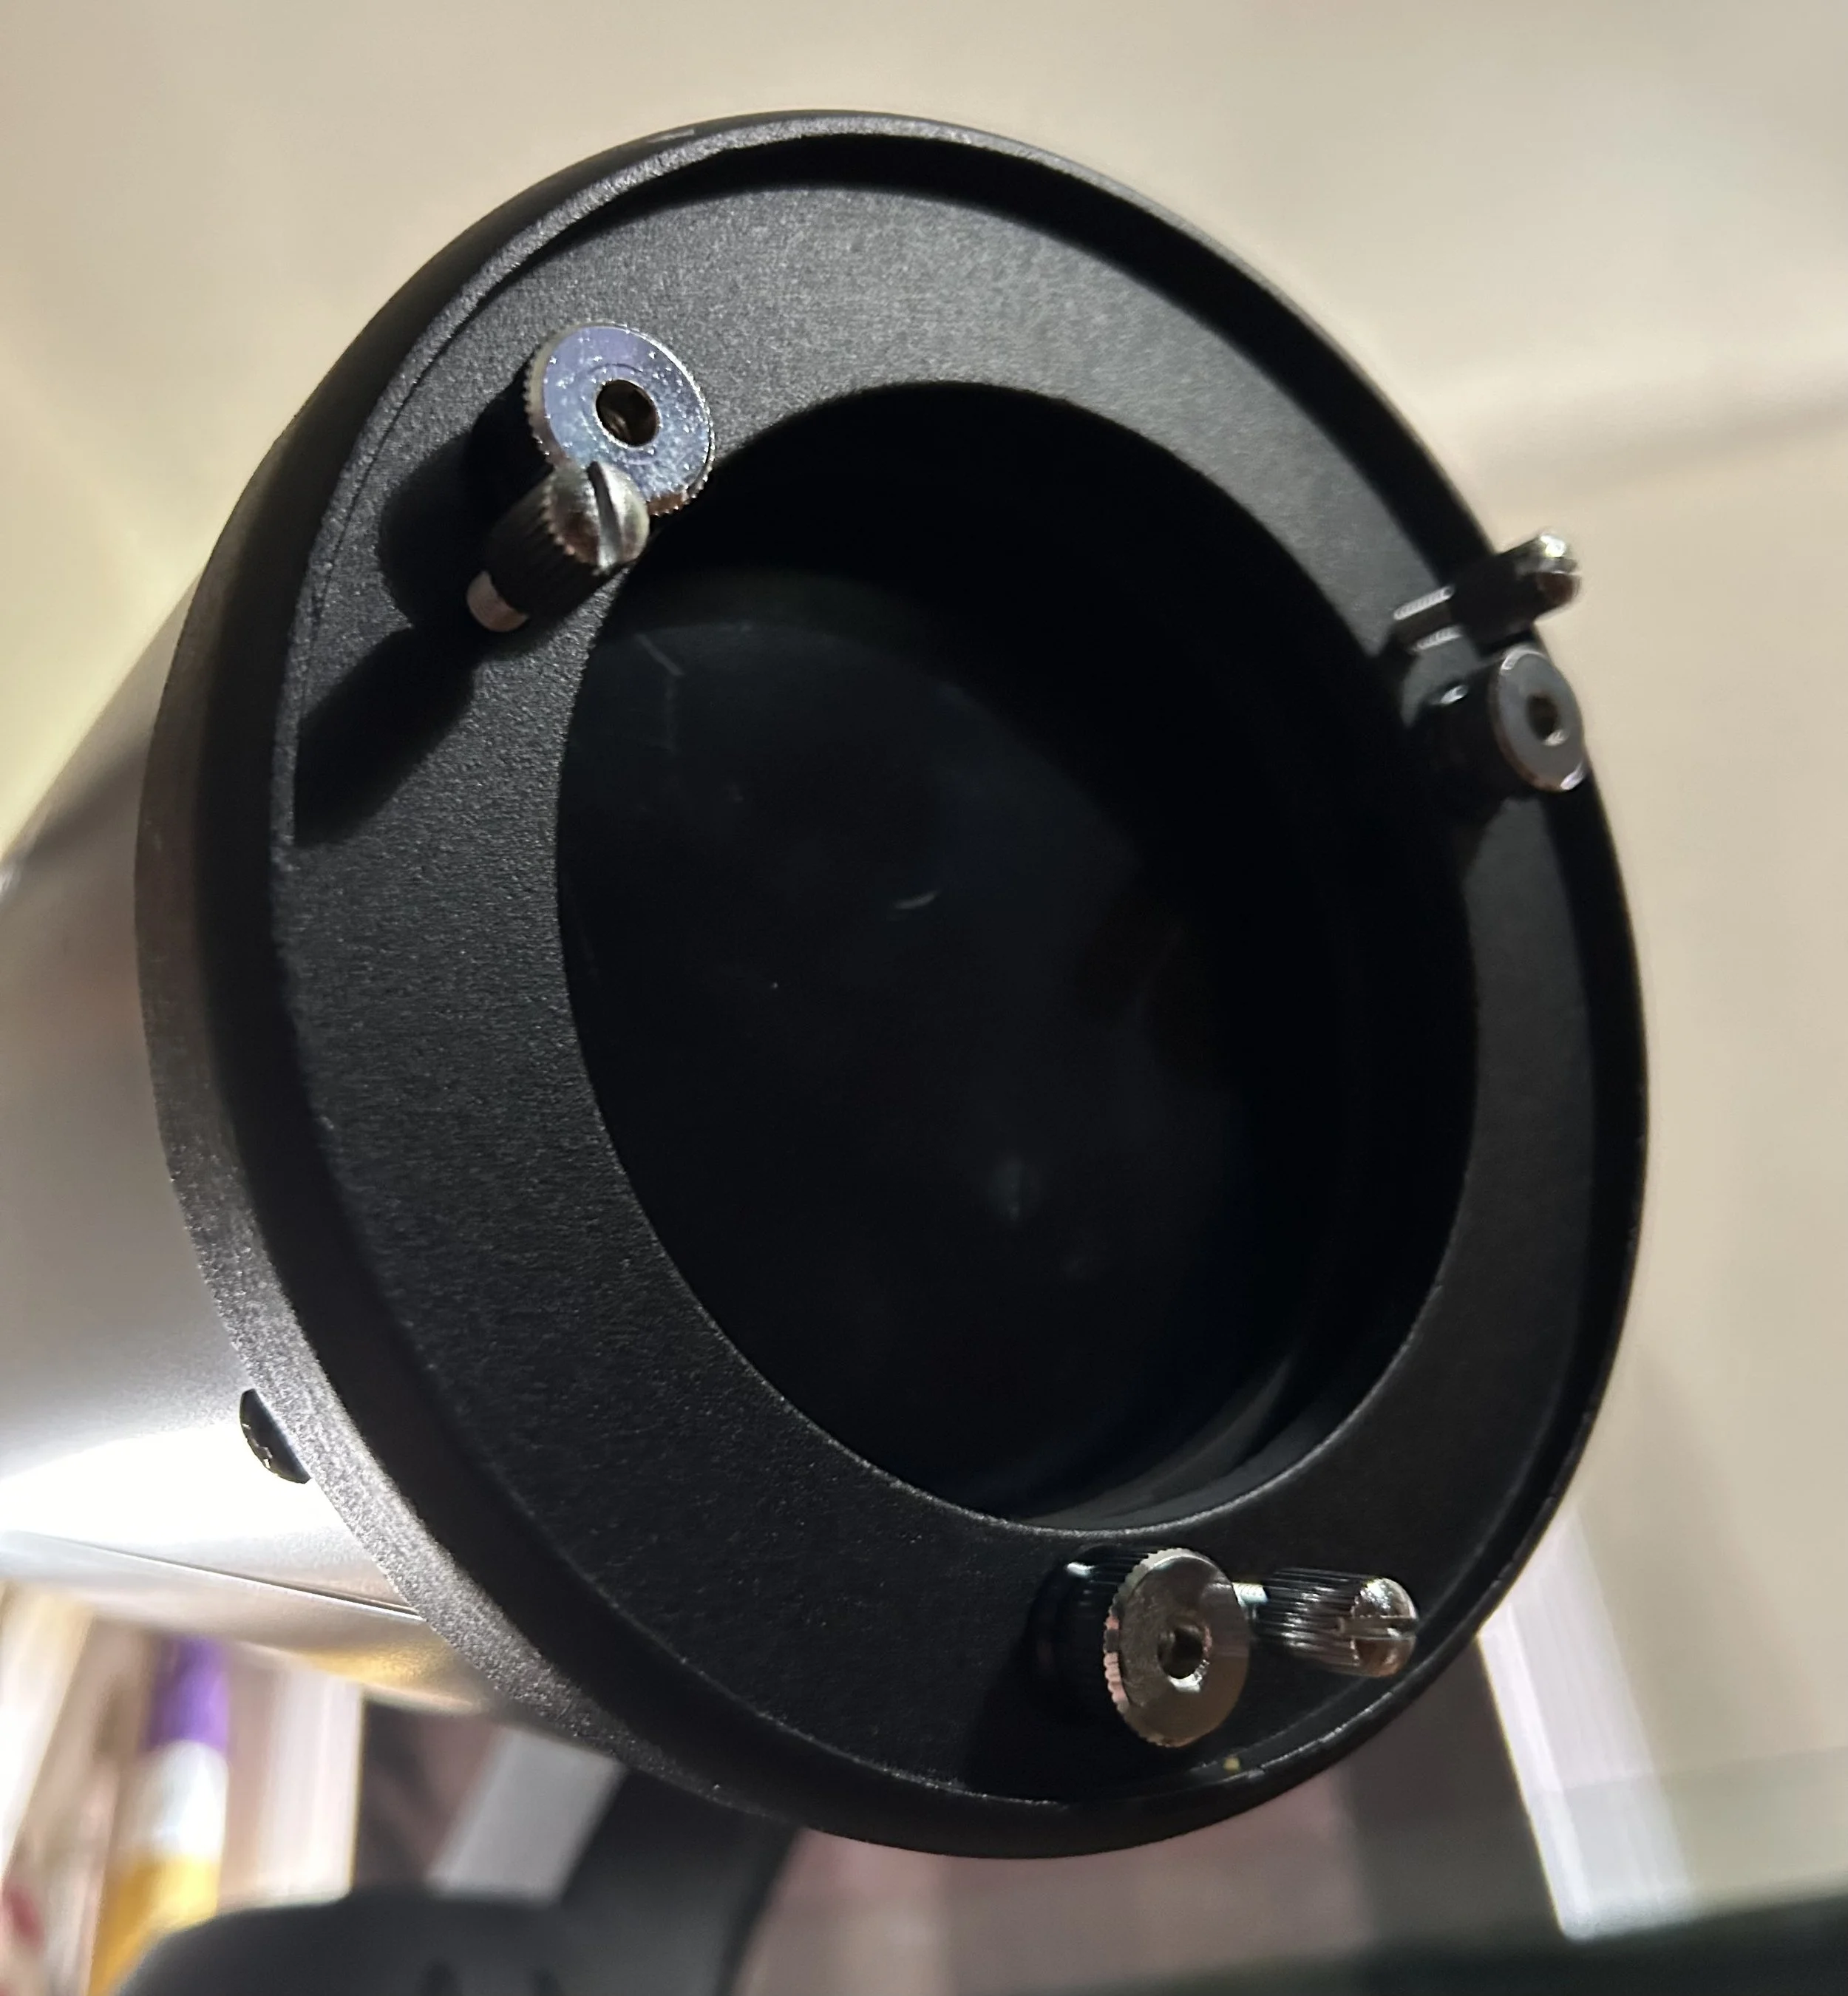
First, set up your telescope on a flat and stable surface and remove the cover from the front of the tube. If you look through the eyepiece and see an off-center, asymmetrical pattern of reflected light, the telescope is out of alignment. At the back of the telescope, you’ll notice three or more collimation screws around the outer edge. These screws allow you to readjust the alignment of the primary mirror.
While slowly turning one collimation screw at a time, watch how the pattern of reflected light in the eyepiece changes. Turn the screw that moves the reflection towards the center of the field of view. Continue adjusting these screws until you achieve a central, symmetrical reflection. When you think you’ve got it right, try pointing the telescope at a star. If the telescope is well-collimated, the star will appear as a tight pinpoint of light. If it’s off, continue to make adjustments.

A laser collimator can be very useful to help get the adjustments just right. Placed in the telescope’s focuser (where the eyepiece usually goes) it emits a low-powered laser that reflects off the secondary mirror at the very center of the primary mirror.
⚠️Warning: Do not shine the laser into your eyes as it could cause damage.
If the telescope is properly collimated, the laser will return back and hit the collimator at the center of the bullseye. If not, the laser will appear off-center. Make adjustments to the three collimator screws at the back of the telescope until the laser is aimed in the center of the bullseye.
You may also need to collimate the secondary mirror as it tilts in the same way as the primary mirror. However, always make sure the primary mirror is collimated first as it is the foundation for the telescope’s whole operation.
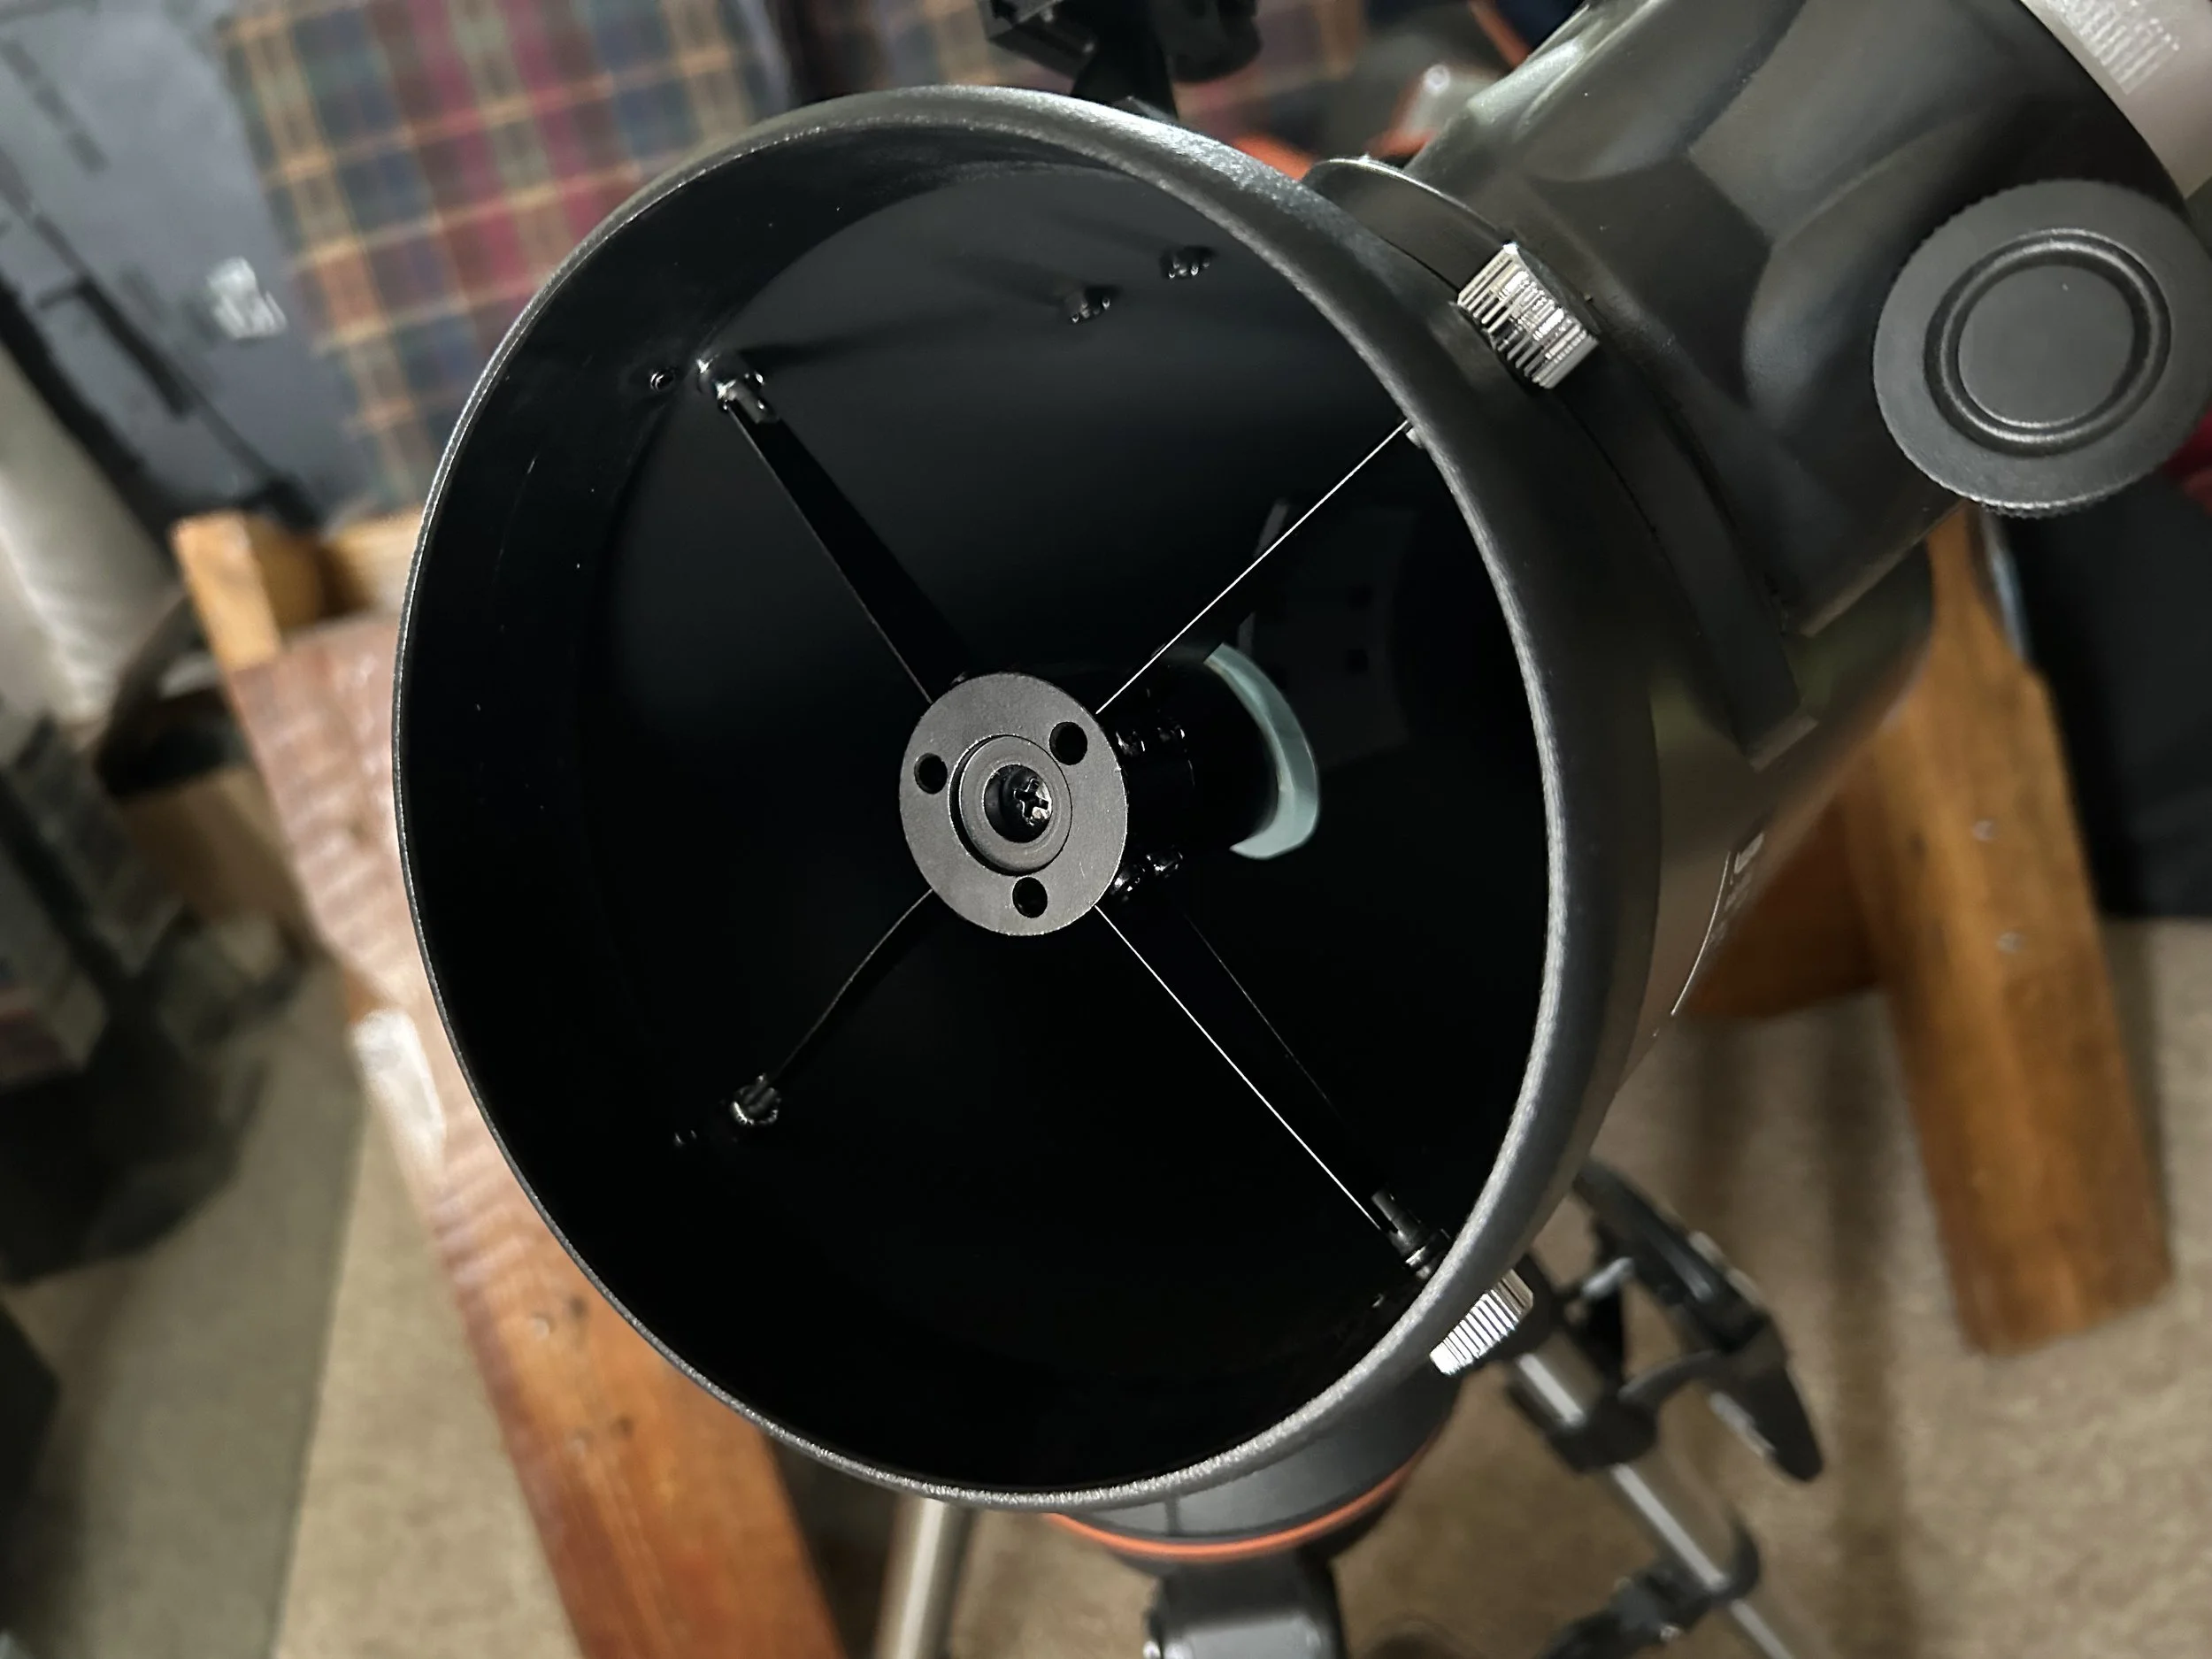
The secondary mirror is positioned towards the front of the tube, facing backwards. It is usually secured to the center of the tube via a cross-section of thin vanes. At the back of the secondary mirror mount are three adjustment screws. You’ll likely need a small Allen wrench to reach and turn them, but otherwise, they work the same way as the primary adjustments.
Peering through a telescope at the vast universe above us is a unique experience that inspires a sense of awe and a profound understanding that you and the cosmos are part of the same thing. This is a gift that all should be allowed to embrace.
If you or anyone you know is struggling with any element of telescopes, whether it be choosing which one to buy or figuring out how to use or collimate it, members of the Harford County Astronomical Society are here for you to provide our enthusiastic knowledge and experience.
Come find us at future events or fill out an outreach request form and ask for assistance and we will do what we can!